
This page covers a few frequently asked questions in using the forum.
The forum software has a full user guide available here.
If you’re interested in some bite sized items to learn, you may want to read up on:
The image below shows the option to Post a New Topic. Unlike the standard forum software, we have a formatting bar to help you customise your post.
In the centre of the image below – just under the subject ‘Who wants some cake?’ – there’s buttons for Bold, Italics, and underline. You can use any or none of those on a word or paragraph.
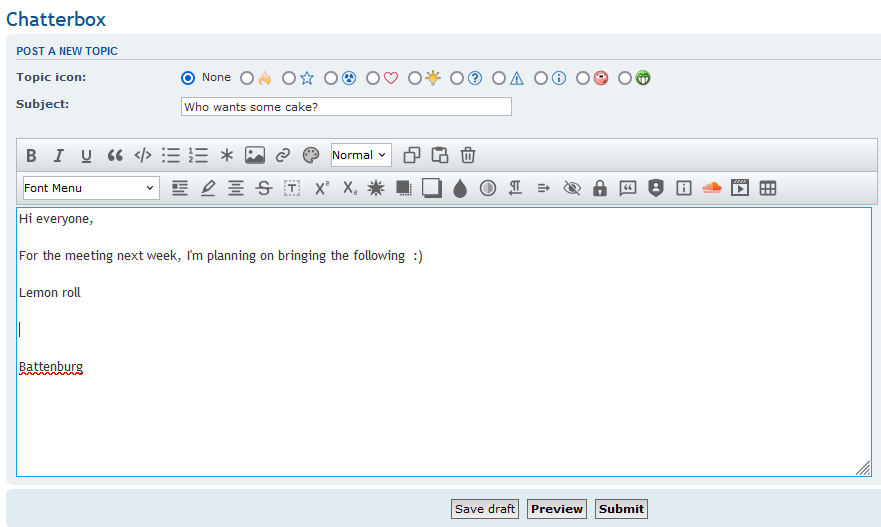
If want to make sure you’ve set the formatting as you would like, press the PREVIEW button to see a demo of your post. You’ve not posted yet, so you’re free to edit things as you need to.
If you have a photo that’s already uploaded to the Internet, you can link to that using the process below. Just be aware that:
- We shouldn’t share content from other people, organisations, etc that we don’t have rights to do so.
- We should always be wary of what we’re sharing, so we don’t upset or offend anyone.
- Google Drive, Google Photos, Facebook, and Instagram are designed to make linking to their content difficult. Best to avoid them as sources for your image.
Okay, with the things to think about out of the way, here’s how we can include an image in a post.
Step 1 – Start a post
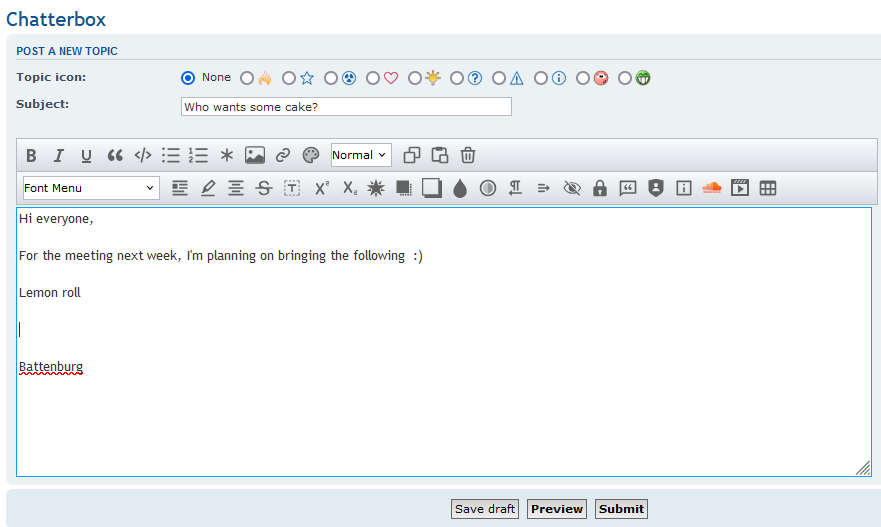
In the image below, we can see the start of a post about cakes. The author has written their draft and now wants to add an image underneath Battenburg.
Step 2 – Adding the code ready to add the image
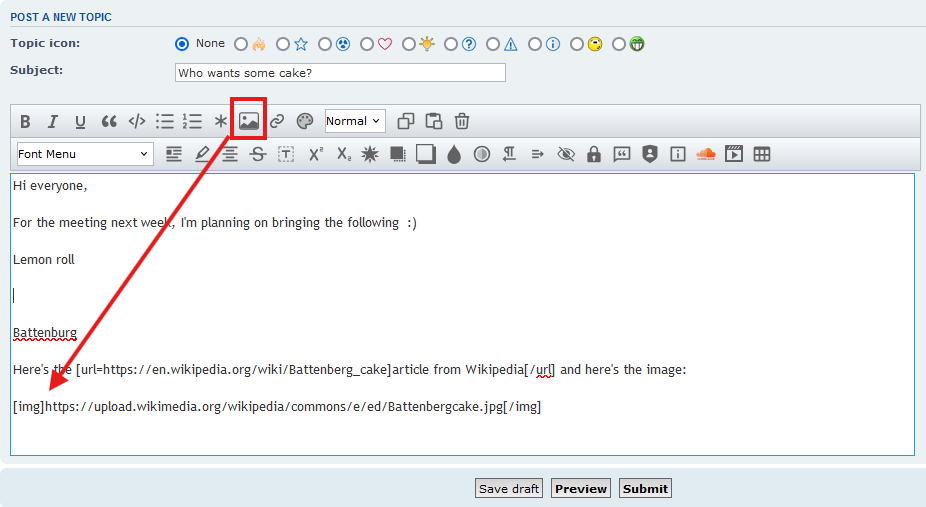
Away from the forum, the author has found an article about Battenberg cakes and they’ve copied the web address of the image to their clipboard.
To add that to the post, the next step is to click in the post, where you want the image to appear.

We can see that the forum has added the ‘image tags’ ready for the web address to be pasted in.
[img] [/img]Step 3 – Pasting in the image’s web address
To add the image, click between the first and second tag, and then paste in the web address of the photo.
E.g.:
[img] https://www.photosofcakesandstuff.co.uk/images/cake.jpg [/img]The image below shows the demo from Wikipedia.
Step 4 – Check & post
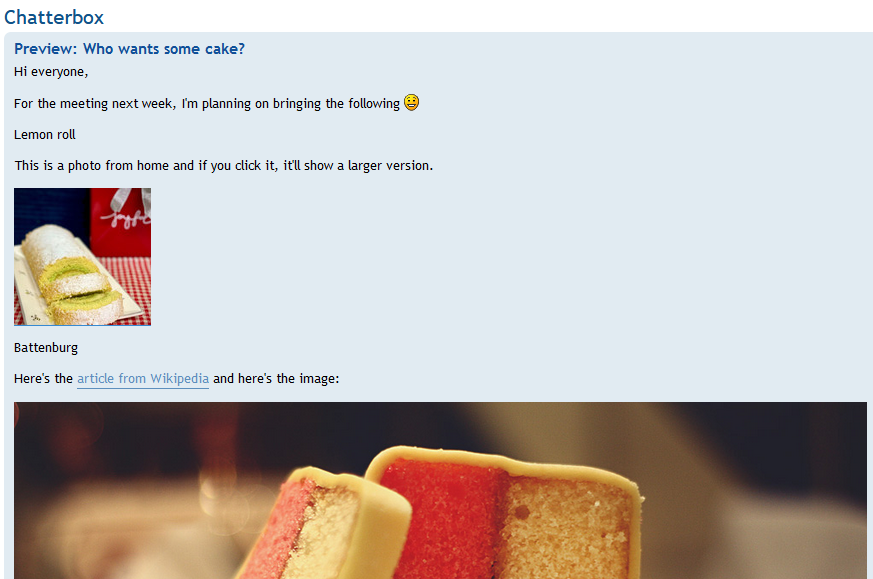
To make sure things are right, use the option marked PREVIEW to see how your post would look.
In the example below, we can see the Battenburg photo has been added to the end of the post.
When you are happy with the result, press the SUBMIT button to post your image.
For security and storage reasons, we do not allow people to upload photos to the forum. Instead, we ask that you put your image on a photo site, and link to it from there.
In this example, we will use Imgbb.com as this creates all the forum code we need, and it offers the option to delete photos after so many days, weeks, or months. Save storage, save the planet! 😉
Step 1 – upload your photo to Imgbb.com
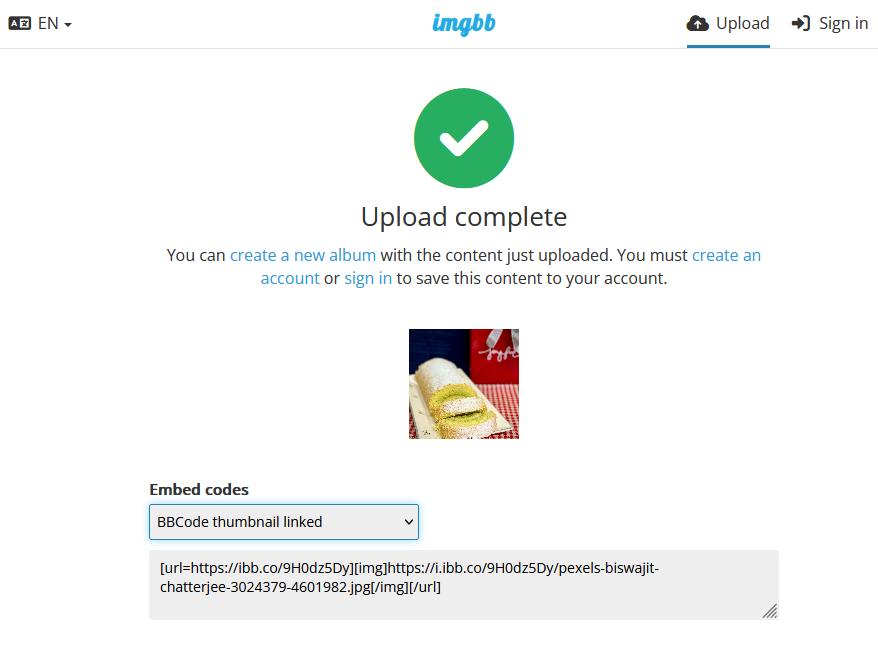
In the example below, the author has uploaded a picture to Imgbb.com. At the bottom of the web page, there’s a drop down menu for Embeded Codes.
The options you can use are:
- BBCode thumbnail linked – this will let you have a small photo in your post, and when clicked, a larger image will appear. Use this if you have lots of photos or have large photos that would swamp the screen.
- BBCode full linked – this puts the full sized image straight into your post. Use this if you’ve got small images.
In this example, we will use the thumbnail option.
Step 2 – copy the code
From the above image, we can see a grey box with some code inside it. This should be copied to your clipboard.
Step 3 – pasting the code
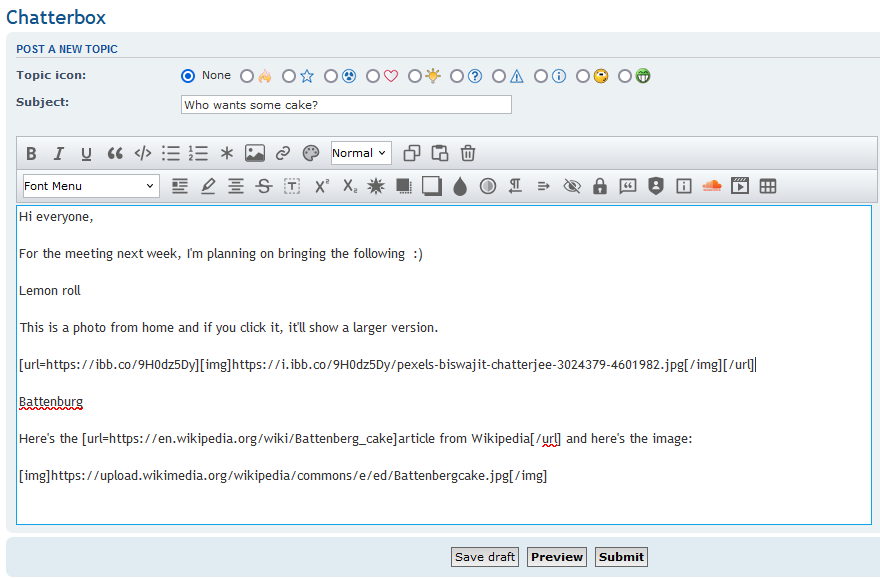
In the example below, the author has written a small post about cakes.
If this was your post, you could click under the Lemon Roll title, and paste in your code.
Step 4 – check & post
As with any other post, we have the PREVIEW button and we can use that to check everything is okay.
When you are happy with the layout, press SUBMIT to post.